 THE GAME ARCHIVE
Tomb Raider: Underworld is a 2008 action-adventure from developer and publisher Crystal Dynamics, documented for Windows. Its publisher-supplied manual is unusually explicit about the small decisions layered into each system: the grapple is not a single verb but a tool for dragging objects, swinging, rappelling, wall-running, and bouncing between close walls; the combat layer asks the player to read how many enemies are present and whether the Adrenaline gauge is full before choosing a move.
What follows is a reading of the documented rules, not a hands-on walkthrough. The manual lays out control schemes and mechanic descriptions, and the useful way to present them is to show how each input chain shapes what a player is actually deciding — which grapple option fits the geometry ahead, when to split fire versus commit to one target, when to spend stored Adrenaline, and where the sonar map fits into loot-hunting.
The Grapple as a Decision: Drag, Swing, and Route Around Obstacles
The grapple has several distinct jobs: attaching to movable objects and dragging them toward Lara, swinging across gaps, and climbing up and down. Once the line connects to a grapple point, the player faces a further choice — pull directly on the point the grapple holds, or bend the line around intervening objects and pull the line toward herself. That second option lets the line's reach follow geometry rather than a straight path, so an attachment can be worked even when something stands between Lara and the point.
The basic sequence is documented for both keyboard and Xbox controller. Stand facing a ring and fire the grapple line with Q (X). After connecting, press E (Y) to pull the line. Press F (B) to detach and retract it. Read as a chain, aiming and positioning come before the line goes out, the pull only applies once a connection exists, and the detach step returns the line rather than leaving it hanging — so the player is constantly sequencing fire, connect, pull, and retract against whatever the puzzle or gap demands.
Rappelling, Wall Runs, and Chimney Jumps: Vertical and Lateral Options
The grapple doubles as a vertical tool. To rappel down a wall or cliff, attach the grapple as usual and then move Lara off the platform by walking or jumping her over the edge, turning the drop into a controlled descent. To climb the other way, position her beneath the grapple point and press the jump key to hang from the line; holding the pull key while using the arrow keys moves her up or down. The same attachment therefore serves both the descent and the climb back, which matters when a route has to be reversed after a puzzle or pickup.
The wall run is the grapple's lateral move. With the line fixed to a wall-mounted ring, Lara hangs suspended below the point and swings left or right with the arrow keys to travel along the wall face; to leave the surface she stops swinging and quickly presses jump to spring away. A separate traversal rule covers tight spaces: when two walls stand close enough to oppose each other, jump toward one and press jump again on contact to bounce back, and repeated presses send her bouncing upward between the pair. Together these give the player three different relationships to a wall — hang, traverse, or ricochet — and the geometry of the space decides which applies.
Dual Targeting, Melee, and Spending Adrenaline
With certain weapons, Lara can target two enemies at once. Faced with two or more enemies, the player presses H (pull x) and Lara automatically fires upon two enemies when it is possible to do so — a split-fire option that rewards reading the number of threats rather than simply holding one aim. Close quarters call for a different input: press E (Y) to perform a melee attack, and if Lara is already holding a picked-up object she uses that object to strike. The player is therefore choosing between spreading fire across a pair and closing in to swing whatever happens to be in her hands.
General combat gradually fills Lara's Adrenaline gauge, shown in the top-left of the screen. When it is completely full, the Adrenaline Headshot becomes available: press Q (X) as an enemy draws close to vault off that enemy and enter Adrenaline mode, move the mouse (or stick) to set the reticle on the enemy's head, and press H (pull x) to fire the one-shot kill. A partial gauge still has a use — with any amount of Adrenaline stored, hold G (w) to lock onto an enemy and press Z (h) to activate concentrated fire for greater damage and impact. The choice is whether to bank a full meter for the finisher or spend partial charge for a harder-hitting ordinary attack.
Evasion: Enemy Vaults, Knockdowns, and Situational Adrenaline
Enemy vaulting is a close-range dodge built on movement plus jump. Move toward an enemy standing very near and press spacebar (A) to jump over or off that enemy, which dodges or confuses it. The same key family handles recovery: when a powerful enemy attack knocks Lara to the ground, press spacebar (A) or F (B) to get her quickly back on her feet. One jump input therefore covers both avoiding a nearby enemy and escaping the knockdown state that follows a heavy hit, while combat movement also includes a multi-directional roll for evasion alongside somersaults forward, back, and sideways.
Situational Adrenaline is a separate automatic system rather than a meter the player fills. Sudden, dangerous situations trigger it on their own; time slows down and Lara's responses are heightened, and the player uses the standard control scheme to avoid the danger rather than learning a new set of inputs. This is distinct from the Adrenaline Headshot, which requires a completely full gauge before it can be performed — one system reacts for the player, the other waits on a resource the player has earned.
The All-Terrain Motorbike and Its Rev-Built Speed Burst
Lara can use a powerful, high-performance motorcycle that can be adapted for use across different terrains. Mounting and dismounting both use E (Y). Steering is handled with A and D or the arrow keys, acceleration with H (pull x), and braking or reversing with G (pull w); while moving, spacebar or F (A or B) applies an emergency brake, and J or K (y or z) fires Lara's weapon from the bike. Because the emergency brake sits apart from the ordinary brake, the player has both a controlled stop and a rapid one available without leaving the vehicle.
The speed burst builds on the bike's braking controls rather than adding a separate button. Holding either brake at the same time as the accelerate key revs the engine, and when the brake is released Lara gains a burst of speed; the higher the revs, the stronger the burst, and it can be performed while moving or at a standstill. In practice the rider brakes and accelerates together, lets the engine wind up, then drops the brake to convert stored revs into a launch — a timing decision rather than a separate ability.
Treasures, Relics, and Reading the Sonar Map
Various Treasures and Relics are scattered through the game world, with Relics described as rarer and harder to find at one per area, and picking up these items unlocks bonus content. The manual therefore advises searching the world thoroughly rather than moving on at the first exit. That advice is backed by a revisit rule: completed locations can be revisited, so a player who clears an area without finding everything is not permanently locked out of what was missed.
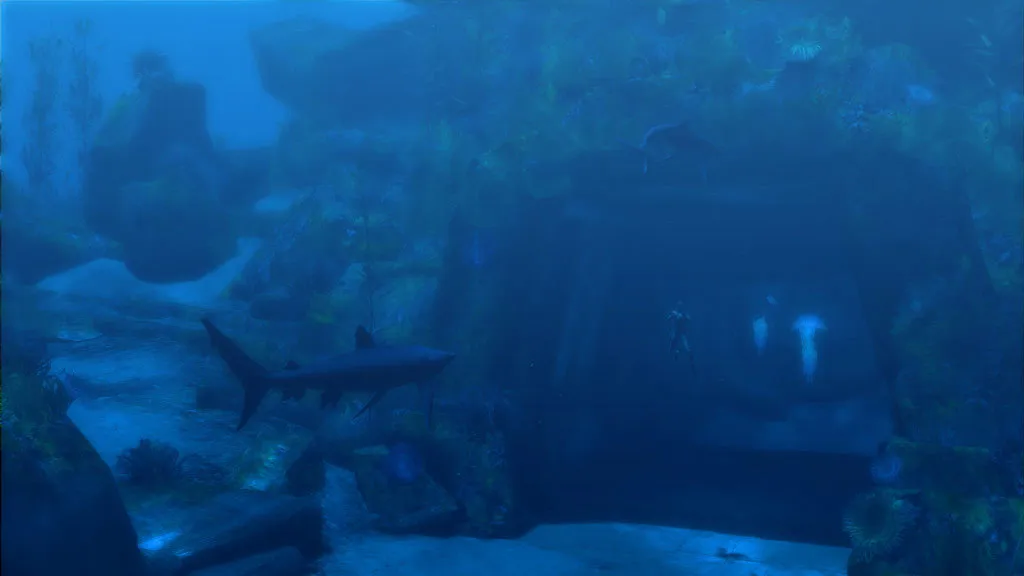
Lara's PDA is activated with Tab, and from it she can emit a sonar pulse that creates a three-dimensional image of her immediate surroundings. Each pulse captures only the nearby area, but the images jigsaw together to build a more complete map as she moves through the space, and the controls for navigating the Sonar Map are displayed on-screen. Area Info sits alongside the map and reports on the area's contents, which pairs with the pulse sweep for locating scattered Treasures and the single Relic each area hides.
Starting Guidance From the Documented Controls
The manual rewards a couple of habits early. First, treat the grapple as aim-then-act: stop, face the ring, fire, then decide whether to pull on the point or route the line around an obstruction before pulling — the two pull options solve different geometry. Second, before speeding off on the bike, check whether the route needs a burst; if it does, hold brake and accelerate together to build revs, then release the brake, since a longer wind-up yields a stronger launch. Third, pulse the PDA sonar as you move so the jigsaw map fills in, and use Area Info to check what an area still holds before leaving it, remembering that you can return later if something is missed.
Scroll sideways to see the full table →
| Item | Documented detail |
|---|---|
| Title | Tomb Raider: Underworld |
| Release year | 2008 |
| Platform | Windows |
| Developer | Crystal Dynamics |
| Publisher | Crystal Dynamics |
| Genres | Action, Adventure |
| Grapple fire / pull / detach | Q (X) / E (Y) / F (B) |
| Dual targeting | H (pull x), two or more enemies |
| Adrenaline Headshot | Full gauge; Q (X) to vault, H (pull x) to fire |
| Concentrated fire | Hold G (w) to lock, Z (h) to activate |
| Bike mount / steer / accelerate / brake | E (Y) / A, D or arrows / H (pull x) / G (pull w) |
| Speed burst | Hold brake with accelerate to rev, release brake to launch |
| Collectibles | Treasures throughout; one Relic per area; bonus content unlocked |
| Missing evidence | No hands-on verification supplied |
Sources & further reading.
- Tomb Raider: Underworld — official game profile Retrieved Oct 21, 2026
- Tomb Raider: Underworld — official game profile — publisher-supplied gameplay manual Retrieved Oct 21, 2026
First published .